Our Blog
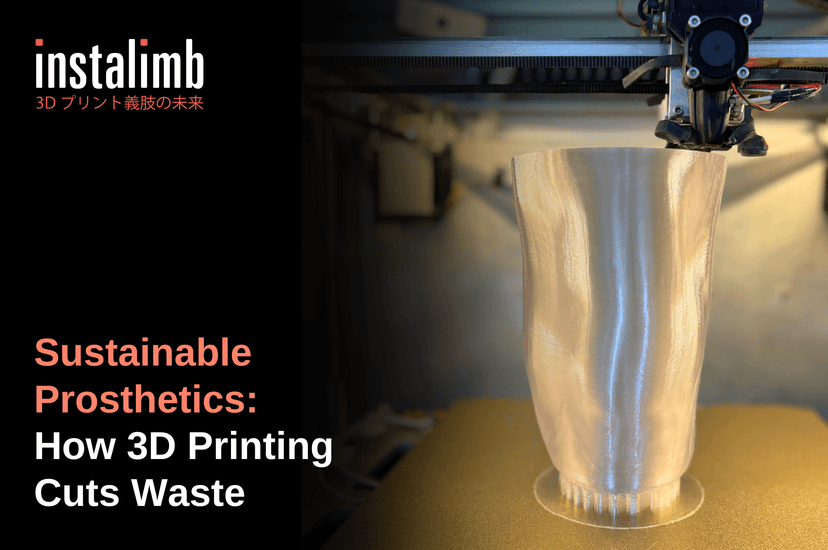
Sustainable Prosthetics: How 3D Printing Cuts Waste
When you picture a new artificial leg, you probably think about comfort, price, and how soon you can walk again. You may not think about the planet, yet the way a limb is made leaves a real environmental footprint. Sustainable prosthetics are quietly becoming one of the biggest shifts in the industry, and at our clinics in Delhi, Bangalore, and Hyderabad, more patients than ever are asking about them.
What Makes Sustainable Prosthetics Different?
Sustainable prosthetics are limbs designed and built to minimise environmental harm, mainly by cutting material waste, energy use, and transport emissions. 3D printing leads the way because it adds material layer by layer instead of carving it away, so a socket uses only what it needs. The result is a cleaner process and, very often, a lower price.
Here is the simple contrast. Traditional prosthetics are made by shaping and cutting, which throws away a lot of raw material along the way. 3D printing works the opposite way, building the exact shape from the ground up. That single difference changes the whole environmental story.
The Hidden Waste in Traditional Prosthetics
The old way of making a limb is surprisingly wasteful. A typical process involves several steps that each leave something behind:
-
Plaster casting: technicians wrap the residual limb in plaster to capture its shape, and those single-use moulds are thrown away after one use.
-
Multiple physical fittings: each remake means more plaster, more raw material, and more discarded trial parts.
-
Warehousing: standard-size components sit in large storage facilities, consuming energy and space.
-
Shipping: heavy devices and parts travel long distances, adding to the carbon footprint before they even reach you.
Add it all up and a single conventional limb can leave a long trail of waste behind it.
How 3D Printing Slashes Material Waste
This is where the numbers get striking. Research on additive manufacturing shows that building objects layer by layer generates roughly 70 to 90 percent less material waste than traditional subtractive methods that cut material away.
A 3D printer lays down only the material the socket actually needs, so the leftover scrap can be as low as around 5%. A better first fit also means fewer remakes, and fewer remakes means far less waste over the life of your device.
At Instalimb, the world's first 3D-printed prosthetic leg and socket provider, a digital scan feeds an AI-guided design that prints with 1mm-level precision. The design lives as a digital file, so there is no plaster mould to throw away and no guesswork to redo.
Beyond Waste: A Smaller Carbon Footprint
Cutting scrap is only the start. Digital, on-demand production shrinks the footprint in other quiet ways:
-
Made to order: limbs are printed when they are needed, so there are no giant warehouses full of unused stock.
-
Local production: a design file can travel instantly, so the limb is made close to you instead of shipped across the world.
-
Greener inputs: the industry is steadily moving toward bio-based and recycled inputs that lower the carbon footprint further.
-
Second life for old limbs: retired prosthetics can often be refurbished or donated rather than dumped.
Together, these steps turn a prosthetic from a high-waste product into a lean, made-to-measure device.
Sustainability You Can Feel in India
For patients in India, sustainable prosthetics are not a distant idea. Because a 3D-printed limb is built from a digital file, it can be produced locally instead of imported, which cuts both shipping emissions and cost.
At Instalimb, we have designed over 500 prosthetics across Delhi, Gurugram, Hyderabad, Bangalore, Mumbai, and Vizag using Japanese 3D printing technology. Our free test socket fitting is, quietly, one of the greenest features we offer, because getting the fit right the first time means we do not waste materials on repeated remakes.
Why This Matters for Everyone
The stakes are bigger than one clinic. The World Health Organization estimates that 35 to 40 million people worldwide need prosthetics and orthotics services, and only about 1 in 10 people who need assistive products can access them.
Meeting that need the old, wasteful way would strain the planet. Meeting it with efficient, low-waste 3D printing is how mobility can scale without a heavy environmental price.
Frequently Asked Questions
Are 3D printed prosthetics really more eco-friendly?
Yes. 3D printed prosthetics are generally more eco-friendly because additive manufacturing builds a limb using only the material required, generating far less scrap than traditional cutting and casting. On-demand, local production also reduces warehousing and shipping emissions, which shrinks the overall carbon footprint of each device.
How much material waste does 3D printing save?
3D printing can cut material waste by roughly 70 to 90 percent compared with traditional subtractive methods, according to research on additive manufacturing. Because a printer adds material layer by layer, leftover scrap can be as low as around 5 percent, which also helps lower the cost of the finished limb.
What happens to old prosthetic legs?
Old prosthetic legs do not have to become landfill. Many components can be refurbished, reused, or donated to patients in need, and parts of the device can often be recycled. Ask your clinic about donation and recycling options when you upgrade to a new limb.
Does a sustainable prosthetic leg cost more?
Usually not. In fact, sustainable 3D-printed prosthetics often cost less, because using only the material you need and skipping repeated remakes saves money as well as resources. At Instalimb, efficient digital design keeps both waste and price down while maintaining a precise, comfortable fit.
Conclusion
Choosing a prosthetic leg is a deeply personal decision, and it is good to know that the smart choice for your comfort and budget can also be the kind choice for the planet. Sustainable, well-fitted mobility is within reach, and you never have to choose between walking well and doing right by the world around you.
Check out our blog section for more!

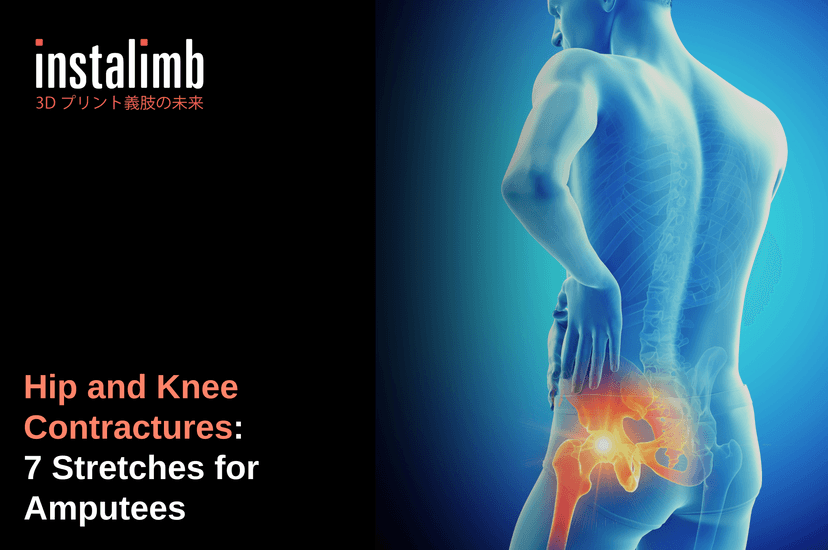
Hip and Knee Contractures: 7 Stretches for Amputees
You've been doing everything right since your amputation: attending physiotherapy, wearing your liner correctly, and practising your walk every day. But if you spend most of your day sitting with your knee bent or your hip curled forward, your joints can quietly stiffen without you even noticing. Hip and knee contractures are one of the most common and most preventable complications after limb loss, and they catch even careful amputees off guard.
What Is a Hip or Knee Contracture?
A contracture happens when the muscles and tendons around a joint tighten permanently, locking it in a bent position. For amputees, this often develops from long hours in a flexed position, such as sitting in a wheelchair or resting with a pillow tucked under the knee.
Research on transtibial amputees shows that knee flexion contractures develop in roughly 13% of patients, with some studies reporting rates as high as 24%, according to a peer-reviewed clinical review (source cited below). Above-knee amputees face a similar risk at the hip: once the joint is flexed beyond 15 degrees, fitting a well-aligned prosthesis becomes significantly harder. Diabetes, prolonged bed rest, and skipping physiotherapy all raise the odds. The tricky part is that contractures build up slowly. You might not notice the stiffness until your prosthetist tells you your socket alignment has shifted, or until you try to stand fully upright and can't.
Why Hip and Knee Contractures Make Prosthetic Fitting Harder
Think of your prosthetic socket like a custom-tailored shoe. It is built around the exact shape and alignment of your residual limb at a specific moment. When a hip or knee contracture sets in, that alignment shifts, and the socket that fit perfectly a few months ago no longer sits flush against your skin.
A hip flexed just 10 to 15 degrees can force your prosthetist to rebuild your entire socket, changing your gait and burning more energy with every step.
A stiff knee can prevent a below-knee socket from seating properly, leading to pressure sores at the areas taking the extra load. At Instalimb, our prosthetists use AI-assisted 3D scanning and 1mm-level socket customisation to catch these small alignment shifts early, before they force a full socket rebuild.
Positioning Habits That Protect Your Joints
Most contractures develop quietly, from daily habits, not accidents. A few small changes in how you sit, sleep, and rest can protect your hip and knee for the long term.
-
Skip the pillow under your knee or thigh. It feels comfortable in the moment, but it trains your joint to stay bent.
-
Avoid long unbroken stretches of sitting. Stand, stretch, or reposition every 30 to 45 minutes.
-
Lie face-down (prone) for 10 to 20 minutes, twice a day, to stretch your hip and knee in the opposite direction of a contracture.
-
Sleep with your leg as flat as possible rather than propped on cushions.
Lying face-down for just 10 to 20 minutes, twice daily, is one of the simplest habits that protects your hip and knee from stiffening.
7 Stretching Exercises to Prevent Hip and Knee Contractures
Stretching works best when it is consistent, not intense. Hold each position for about 30 seconds and repeat several times a day.
-
Prone lying: Rest on your stomach for 10 to 20 minutes to stretch both the hip and knee at once.
-
Standing hip extension: Hold a wall or chair, step your residual limb back, and press the hip gently forward.
-
Adductor stretch: Sit against a wall with your limb positioned out to the side, especially useful for above-knee amputees.
-
Heel prop knee extension: Prop your heel on a rolled towel and let gravity gently straighten the knee.
-
Hamstring stretch: Sit with your leg extended and reach toward your toes without rounding your back.
-
Standing hip flexor stretch: Lunge gently forward, keeping your back leg straight to open the front of the hip.
-
Active knee bends: Slowly bend and straighten the knee through its full range, several times a day, to maintain mobility.
Consistent stretching, even five minutes at a time, does more for your joints than one long session a week.
How 3D-Printed Sockets Help Protect Healthy Alignment
Traditional plaster-cast sockets are hard to adjust once early signs of a contracture appear. Instalimb's approach is different. Our prosthetists combine 3D CAD scanning with AI-assisted design to model your residual limb's exact shape and adjust the socket to 1mm precision, so small changes in your joint position get caught during routine reviews rather than after they have caused a problem.
At Instalimb, we have designed over 500 prosthetics across Delhi, Gurugram, Hyderabad, Bangalore, Mumbai, and Vizag, and our clinicians routinely screen new and returning patients for early signs of hip or knee stiffness before finalising a socket fit. If a contracture is already present, our team can factor it into the design rather than forcing your joint into a position it cannot comfortably hold.
When to Call Your Prosthetist: Red Flags You Shouldn't Ignore
Not every ache means a contracture, but a few signs are worth a same-week call to your clinic:
-
Your knee or hip won't fully straighten even after stretching for several days.
-
Your socket suddenly feels tight on one side or loose on the other.
-
You notice new pressure marks or redness that doesn't fade within 20 minutes.
-
Standing fully upright feels different from it did a month ago.
Catching a developing contracture early usually means a simple adjustment. Waiting means a full socket rebuild.
If you're ever unsure, Instalimb offers a free test socket fitting, so there is no cost barrier to getting checked.
Frequently Asked Questions
Can hip and knee contractures be reversed?
Mild contractures can often improve with consistent stretching, positioning changes, and physiotherapy, especially when caught early. More severe or long-standing contractures may need bracing, serial casting, or, in rare cases, surgical release. The earlier you address stiffness, the more likely gentle stretching alone will work.
How long does it take for a contracture to develop after amputation?
Some amputees develop noticeable stiffness within just a few weeks of prolonged bed rest or inactivity, while others take months. Hip and knee contractures often develop during the early recovery period, which is why physiotherapists recommend starting positioning and stretching routines within days of surgery, not after discharge.
Are contractures more common in above-knee or below-knee amputees?
Both above-knee and below-knee amputees are at risk, though the joint involved differs. Below-knee amputees more often develop knee flexion contractures, affecting roughly 13 to 24 percent of patients in various studies, while above-knee amputees are more prone to hip flexion contractures that complicate prosthetic alignment.
Do stretching exercises really prevent contractures?
Yes, consistent stretching combined with proper positioning is one of the most effective ways to prevent contractures. Holding each stretch for around 30 seconds, several times a day, keeps the muscles and tendons around your hip and knee from shortening, especially when paired with several hours of general daily activity.
Can a 3D-printed socket accommodate an existing contracture?
Yes. Unlike a rigid, one-time-cast socket, a 3D-printed socket built with CAD design can be adjusted to accommodate a mild contracture while still supporting a stable gait. At Instalimb, our prosthetists can factor an existing joint limitation into the socket alignment rather than asking your body to force a position it cannot hold.
Conclusion
A hip or knee contracture is one of those complications that sneaks up quietly, but it responds just as quietly to consistent care. A few minutes of stretching, a little more attention to how you sit and sleep, and a prosthetist who checks your alignment regularly can keep your joints and your mobility exactly where you want them.
Check out our blog section for more!
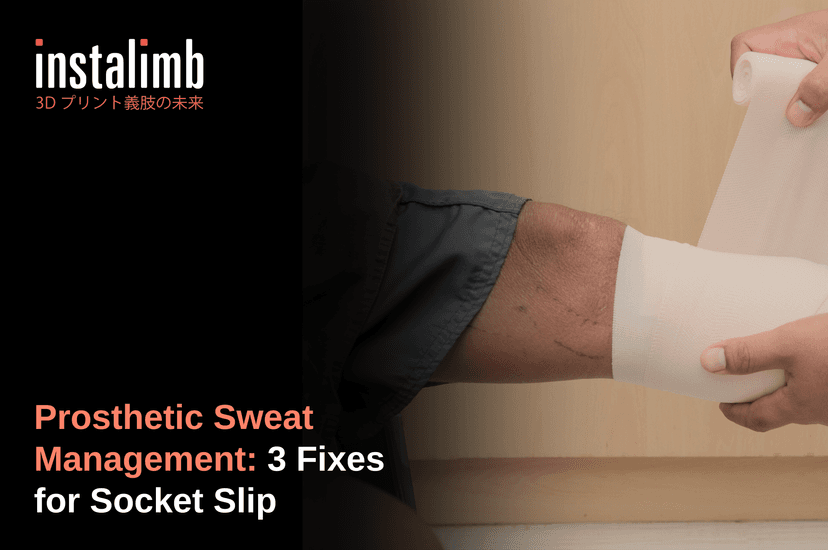
Prosthetic Sweat Management: 3 Fixes for Socket Slip
If you live somewhere as humid as Mumbai or Vizag, you already know your prosthetic liner turns into a personal sauna by mid-afternoon. Prosthetic sweat management is not a minor comfort issue; it is the difference between a socket that stays put all day and one that slips, slides, and puts your skin at real risk.
Prosthetic Sweat Management: Why Your Liner Turns Into a Sauna
A prosthetic liner is essentially a rubber sleeve worn tight against your skin, so heat and moisture have nowhere to go. In hot or humid weather, that trapped sweat turns the liner into a greenhouse for bacteria and softens the seal between your limb and the socket, which is exactly what causes the slipping known as pistoning.
Once you understand that your liner is trapping heat rather than causing it, the fix stops feeling like a mystery and starts feeling like basic maintenance, the same way you would manage sweat in any other tight-fitting gear.
The Real Problem: Pistoning, Odor, and Skin Breakdown
Pistoning is the up-and-down slipping motion that happens when sweat builds up faster than it can escape, reducing suction and stability inside the socket. Left unmanaged, this trapped moisture does more than cause odour.
-
It softens and weakens skin, making it more prone to rashes and breakdown
-
It can lead to fungal infection or irritation that keeps recurring in the same spot
-
It changes your gait as the socket shifts slightly with every step
Managing sweat properly protects your skin just as much as it protects your comfort.
Perforated and Vented Sockets: Letting the Heat Escape
One of the more promising fixes researchers have studied is the perforated or vented liner and socket system, essentially small, engineered holes that let built-up moisture and heat escape instead of pooling against your skin. A study published in Scientific Reports found that vented liner-socket systems reduced humidity buildup during periods of heavy sweating compared to standard, non-vented designs.
Separate research on perforated liners found they were genuinely effective for residual limb skin health, particularly for patients already dealing with wounds or recurring irritation, especially when combined with proper suction.
This is the kind of design detail that benefits from precise digital fitting. Instalimb's 3D CAD modelling and AI-assisted socket design allow venting to be planned around your specific pressure zones rather than added as an afterthought, while still holding the 1 mm level of customisation the socket needs to stay secure.
Medical-Grade Antiperspirants: A Simple Daily Habit
Beyond socket design, a medical-grade antiperspirant applied to the residual limb at night can meaningfully cut down on daytime sweating. This is a genuinely simple habit, not a device upgrade, and it works the same way antiperspirant works anywhere else on the body, by temporarily reducing how much a gland releases.
Clinicians studying residual limb hyperhidrosis, the medical term for excessive sweating in this area, note that options range from these topical antiperspirants all the way to prescribed treatments for more severe cases. Starting with the antiperspirant is the easiest first step for most patients.
Why a Spare Liner in Your Bag Is a Game-Changer
If you commute through Delhi's summer heat or spend a humid afternoon outdoors in Hyderabad, carrying a spare liner and a couple of extra prosthetic socks in your bag is one of the most underrated habits an amputee can build.
-
Swap a soaked liner for a dry one on a long day instead of pushing through discomfort
-
Adjust sock ply as your limb volume shifts with heat and activity
-
Avoid the embarrassment of a slipping, squelching sock in the middle of a meeting or commute
Carrying a backup liner is a small habit that prevents a genuinely disruptive afternoon.
Frequently Asked Questions
Why does my prosthetic leg make a farting sound?
That sound happens when trapped air and sweat get pushed out from between your liner and socket as you walk; it's usually a sign your socket has too much moisture buildup or the seal has loosened. It is extremely common and not something to be embarrassed about, but it is worth mentioning to your prosthetist.
How can I stop my prosthetic liner from slipping in hot weather?
Managing sweat is the main fix: use a medical-grade antiperspirant at night, consider a perforated or vented liner if you sweat heavily, and carry a spare liner and socks so you can swap out a soaked one during the day instead of tolerating slippage.
Are vented or perforated prosthetic sockets actually effective?
Yes, research has shown vented liner-socket systems reduce humidity buildup compared to standard designs, and perforated liners have been linked to better residual limb skin health, especially for patients managing existing wounds or irritation.
Is excessive sweating in a residual limb a medical condition?
It can be. Residual limb hyperhidrosis is the clinical term for excessive sweating in this area, and while many patients manage it with antiperspirants and better socket design, more severe cases can be discussed with a clinician for additional treatment options.
How often should I clean my liner to manage sweat and odour?
Clean your liner nightly with a pH-balanced, fragrance-free soap and let it fully air dry before wearing it again. A damp liner reused the next morning traps bacteria and moisture from the day before, undoing most of your sweat management efforts.
Sweat is one of those unglamorous, rarely discussed parts of living with a prosthetic, but it is also one of the most manageable. With the right socket design, a simple nightly habit, and a spare liner tucked away for hot days, you can stay comfortable, confident, and dry no matter how the weather behaves.
Check out our blog section for more!


