Our Blog
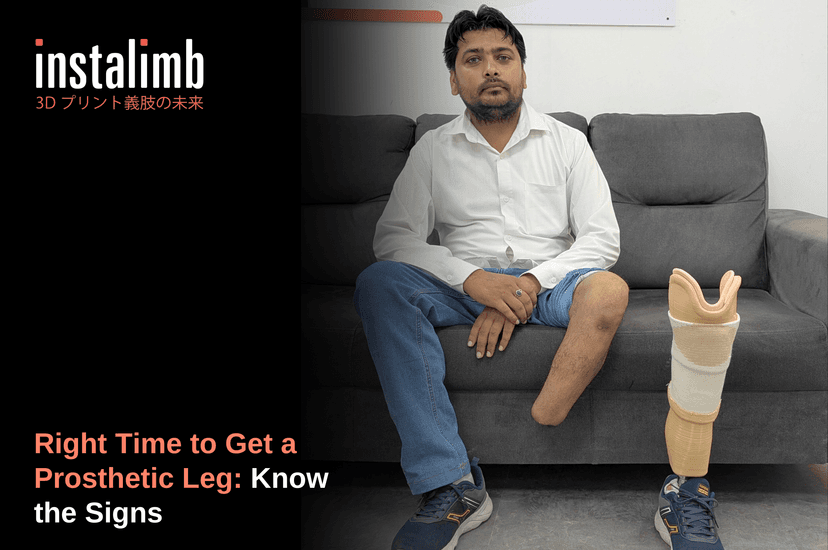
Right Time to Get a Prosthetic Leg: Know the Signs
If you or someone you love has recently had an amputation, one question tends to arrive before almost any other: when is the right time to get a prosthetic leg? It's a fair question.
In India today, diabetic foot disease is fast overtaking accidents as a cause of limb loss. That shift means the answer looks a little different than it used to.
The good news is simple. Readiness has far less to do with a calendar date than with the signs your body gives you. This guide walks you through exactly what to look for.
What Is the Right Time to Get a Prosthetic Leg?
It's natural to want a straightforward answer, a date you can circle and wait for. But prosthetic rehabilitation rarely works like that. Understanding why can take a good deal of pressure off you and your family.
There is no single fixed date for the right time to get a prosthetic leg. Clinicians instead look for signs of readiness.
These include a healed incision, swelling that has settled into a manageable pattern, stable skin, and sign-off from both your surgeon and your prosthetist. Straightforward below-knee cases are usually fitted 6 to 12 weeks after surgery.
Above-knee (transfemoral) amputations, or wounds that healed with complications, often need longer. That is not a setback. It's simply a different starting point on the same path. Your care team will tell you where you stand.
Modern socket-making includes Instalimb's use of 3D-CAD design and 3D printing. This means even an "early" fitting can be revisited and refined as your limb settles. It isn't a one-time, make-or-break event.
Why India's Amputees Face a Different Timeline
Road Traffic Accidents vs Diabetic Foot Disease
For years, road traffic accidents drove most prosthetic needs in India. That picture is changing quickly. Recent South Indian hospital data found that diabetic foot disease now causes 42% of amputations.
That's ahead of peripheral arterial disease (22%) and trauma (16%). Below-knee amputations made up 70% of cases (Dwaarakesh MS et al., 2026).
This shift matters. Diabetic amputees are often older and manage other health conditions alongside their amputation. They may need a slightly different, more gradual rehabilitation plan than a younger trauma patient.
What the Indian Rehabilitation Data Shows
A tertiary rehabilitation centre study in Northern India covered 106 unilateral lower-limb amputees. It found road traffic accidents still account for 68.87% of cases there.
Diabetes and cancer were each responsible for 8.49% (Deepak K et al., Cureus 2023). Whatever the cause, the same question follows every patient: when is it my turn to be fitted?
The Three Stages of Residual Limb Healing
Your residual limb, often called the stump, does not stop changing the moment your wound closes. Research shows it continues reshaping for at least 100 days after surgery. It moves through three recognised stages (Sanders & Fatone, 2011).
Acute Stage (Weeks 4 to 8)
This is the wound-healing phase. Swelling is at its highest and the incision is still closing. Your care focuses on protecting the limb, not on fitting anything permanent.
How this stage is managed matters. One study found elastic bandaging got patients to fitting in 34 days, versus 64 days with a semi-rigid dressing.
Intermediate Stage (Months 4 to 6)
You typically receive your first formal prosthesis here. Expect frequent socket adjustments, though, as volume keeps shifting. This is completely normal. It doesn't signal that anything has gone wrong with your healing.
Stable or Mature Stage (Months 12 to 18)
By this point, most residual limbs have settled into a fairly consistent shape and volume. Clinically, a limb under twelve months old is still considered "immature", which is simply a description of its healing stage, not a verdict.
Signs You Are Ready for a Prosthetic Fitting
Counting weeks isn't the point. Your surgeon and prosthetist look for a combination of practical signs instead. Readiness is defined by what your limb and body are doing, not by a date on the calendar. Broadly, you are likely ready when you notice:
-
Your surgical wound has fully healed, with no open areas or drainage
-
Swelling has settled into a predictable, manageable pattern, not something that changes day to day
-
Your skin can tolerate gentle pressure and contact without breaking down
-
You have clear functional goals, whether that is walking to the bathroom unaided or returning to work
-
Your surgeon and prosthetist both agree, independently, that you are ready to proceed
If you are unsure which of these apply to you, a quick clinical assessment can usually answer it within minutes.
Does a Changing Residual Limb Mean You Have Missed Your Window?
If your limb still looks swollen or seems to change shape from morning to evening, you have not missed anything. This is one of the most common worries we hear. It is almost always a sign of normal healing, not a problem.
Residual limb volume genuinely keeps changing for months. That's precisely why early sockets are built to be adjusted, not fixed in place [why residual limb swelling keeps changing in the early months].
There is no hidden deadline that closes a door on you. As long as you are progressing through healing, the window stays open. Your care team can guide pacing from here.
What Happens If Fitting Is Delayed Too Long?
Waiting too long, especially without any clinical check-in, can carry real risk. In the Northern Indian cohort mentioned earlier, 20.75% of unilateral lower-limb amputees reported stump-related problems.
They attributed these directly to delayed prosthetic fitting (Deepak K et al., Cureus 2023). The same study recorded the lowest WHOQOL-BREF quality-of-life scores in the physical domain, at just 47.91 out of 100.
Delayed fitting is linked to measurable, preventable problems, not just inconvenience. These can include skin changes, muscle weakness from disuse, and joint stiffness.
All of this can make later fitting harder than it needed to be. The fix is not necessarily rushing into a prosthesis. It is simply not letting weeks turn into many months without anyone checking in on your progress.
A Note for Caregivers: Starting the Conversation
If your parent or elderly relative has recently had an amputation, you may be wondering when, or even whether, to raise the subject of a prosthetic limb.
In many Indian households, this conversation happens within a large joint family, often with several opinions in the room at once.
Age and diabetes do not automatically rule a prosthetic fitting out. What matters is wound healing, blood sugar control, and overall strength. A prosthetist can assess these directly, instead of guessing from age alone.
It also helps to give your relative space to process the emotional side of amputation before focusing purely on logistics [coping with grief after amputation].
A gentle way to start is simply asking your relative's surgeon when a prosthetic assessment might reasonably be considered, rather than assuming either a yes or a no in advance.
Why Does Modern Socket Making Make Timing Less Stressful?
One reason timing feels less high-stakes than it used to is how sockets are made today. Digital scan-based socket fabrication, the kind of process Instalimb uses it to let a prosthetist capture your residual limb's exact shape.
The socket can then be reshaped as healing progresses, instead of waiting for the limb to fully mature before fitting can even begin [how digital scanning beats plaster casting].
This approach combines 3D-CAD design, 3D printing and AI-assisted adjustments to achieve socket customisation down to 1mm. Small week-to-week changes in your limb do not mean starting from scratch each time.
At Instalimb, we have designed over 500 prosthetics across Delhi, Gurugram, Hyderabad, Bangalore, Mumbai, and Vizag. That volume of iterative fitting experience shapes how we think about timing: less as a single decision, more as an ongoing, adjustable process.
Planning Around Festivals, Travel and Winter
Festival season brings its own pressure. Around Navratri, Dussehra and Diwali, extended family gathering for the occasion often means well-meaning but pointed questions like "have you been fitted yet?" It helps to remember that your timeline belongs to you, not to the festival calendar.
Practically speaking, fitting access in India is still concentrated in city centres and periodic partner camps. It's worth planning travel ahead of your appointments, not around them.
Winter also brings its own considerations. Cooler, drier air can affect skin and socket comfort, so regular check-ins are even more useful during these months.
Incidentally, International Prosthetics & Orthotics Day falls on November 5 each year. It's a fitting moment to start the conversation, if you've been putting it off.
Frequently Asked Questions
1. How soon after amputation can I get a prosthetic leg?
Most people with a straightforward below-knee (transtibial) amputation are ready for their first fitting around 6 to 12 weeks post-surgery, once the incision has healed and swelling is manageable.
Above-knee or complicated wounds often take longer. Readiness is judged by clinical signs, not a countdown of weeks, and is confirmed jointly by the surgeon and prosthetist.
2. Is it normal for my residual limb to still be swollen or changing shape weeks after surgery?
Yes, this is normal. It doesn't mean the window has closed on you.
Residual limb volume keeps changing for at least 100 days after amputation, as swelling resolves and tissue remodels. This is why early sockets are adjusted frequently, instead of being built once and left unchanged.
3. What are the signs that someone is ready for their first prosthetic fitting?
Readiness is marked by a fully healed incision, swelling that has stabilised enough for a consistent socket fit, and healthy, stable skin over the residual limb.
Sign-off from both the surgeon and prosthetist confirms it. These signs matter more than counting weeks since surgery, because healing speed varies by person and amputation level.
4. Can elderly diabetic patients still get a prosthetic limb fitted?
Yes, age and diabetes alone don't rule out a prosthetic fitting. What matters is wound healing, blood sugar control, and overall health, which prosthetists assess individually.
In India, diabetic foot disease is now the leading cause of amputation. Clinics increasingly plan fitting timelines and rehabilitation goals around older, comorbid patients, not just younger trauma patients alone.
5. What happens if prosthetic fitting is delayed too long after amputation?
Prolonged delay can lead to preventable complications.In an Indian study of unilateral lower-limb amputees, over a fifth reported stump-related problems attributed to delayed fitting, alongside lower physical quality-of-life scores. Timely assessment, even if full fitting isn't yet possible, helps catch and manage these issues early.
Check out our blog section for more!

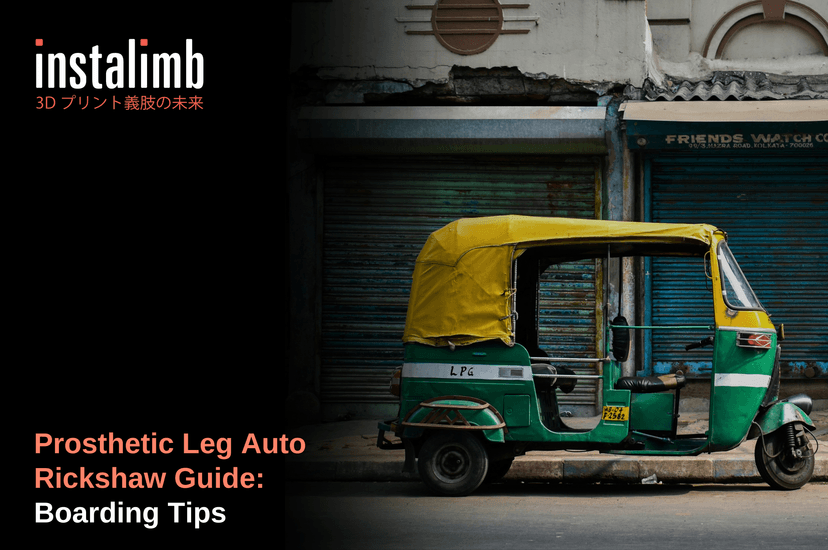
Prosthetic Leg Auto Rickshaw Guide: Boarding Tips
Stepping up into an auto rickshaw with the driver already revving, a queue of passengers behind you and no handrail to speak of, can turn a thirty-second boarding into the most stressful part of your day. If you use a prosthetic leg, that single high step onto the footboard is where confidence and fear meet, and getting it right changes how safe every ride feels.
This prosthetic leg auto rickshaw guide walks you through the exact sequence for autos, jeeps and shared tempos, so you can board and alight with control instead of guesswork. [driving with a prosthetic leg] covers one part of getting around India independently; boarding shared transit safely is the other.
How to Safely Board an Auto, Jeep or Tempo with a Prosthetic Leg
To board an auto, jeep or Tempo safely, grip the handrail or seat frame first, step up leading with your sound leg, then shift your weight onto the prosthetic side only once it feels stable. Below-knee users can usually push off steadily; above-knee users should pause briefly to stabilise the knee before committing their full weight.
This single step matters more than it looks. Autos, jeeps and shared tempos are the backbone of last-mile travel across Indian cities, towns and hill routes, yet most offer only one footboard and no second handhold. Our 3D-printed sockets are engineered for exactly this kind of precise, repeatable fit, because getting the sequence right every time is what keeps a routine boarding from turning into a fall.
Why the High Step Up Feels Different for Below Knee vs. Above Knee Users
Not every prosthetic user faces the same challenge on that step. The biomechanics of an unsupported high step-up, one with no handrail or ramp to lean on, differ sharply depending on where your amputation sits.
A pooled review of major limb amputation in India, covering 7,272 patients across 14 studies, found that lower-limb amputations make up 90.8% of cases. Trauma was responsible for 73.1% of them (International Journal of Community Medicine and Public Health, 2026), so this challenge touches a huge share of Indian prosthesis users.
Walking on uneven terrain demands similar awareness, but a vehicle step compresses it into one fast movement.
More than half of prosthesis users fall at least once a year, according to a 2026 clinical biomechanics study, and an unsupported high step-up is exactly the kind of moment that can contribute to a fall.
Below-Knee Users: Controlling the Push-Off
If you have a below-knee, or transtibial, amputation, meaning the limb was removed below the natural knee joint, your own knee stays intact. You mainly manage the step through ankle motion and how securely your socket, the custom-fitted cup that holds your residual limb, grips your leg. A steady push-off through the sound leg, followed by a confident weight shift, usually carries you up cleanly.
Above-Knee Users: Managing Knee Flexion on the Way Up
An above-knee, or transfemoral, amputation, removed above the knee, means your prosthetic knee joint has to be actively controlled through the entire unsupported motion. The limb can buckle if weight transfers before that joint is stable. A 2026 clinical biomechanics study found that the balance tests predicting falls differ by amputation level, using the Four Square Step Test for below-knee users and the Timed Up and Go Test for above-knee users. This confirms the step-up challenge is a measurable biomechanical difference, not a confidence problem.
Step-by-Step: Getting Into an Auto Rickshaw
-
Approach from the open side and get a firm three-point grip: one hand on the frame or handrail, both feet planted.
-
Lead with your sound leg onto the footboard, keeping your weight back until your hand grip is secure.
-
Pause for a breath. Do not let an impatient driver or a queue behind you rush this moment.
-
Shift your weight onto the prosthetic side only once your sound leg and hand grip feel stable.
-
Bring the prosthetic leg up and settle into the seat, releasing the handhold last.
Indian traffic rarely pauses for anyone, and drivers can be visibly impatient. Rushing the sequence, not the extra two seconds it needs, is what actually causes falls.
Step-by-Step: Getting Into a Jeep or Shared Tempo (Higher Footboards)
Jeeps and shared tempos are standard transit in smaller towns and hill routes, and their footboards usually sit higher than an auto's.
-
Check for a second rail or roof bar; many jeeps and tempos have one, unlike most autos.
-
Use both hands where possible, forming a wider base before you commit to the step.
-
Lead with the sound leg, letting the prosthetic leg follow in a controlled, unhurried motion rather than swinging it up.
-
If the footboard is wet or uneven, ask a co-passenger or the conductor for a hand rather than guessing your grip.
-
Once inside, choose a seat near the door if the route has several short stops.
Getting Out Safely: The Alighting Sequence Matters Too
Boarding gets most of the attention, but alighting carries its own risk, often because the vehicle is still rolling to a stop or other passengers are already pushing past. Reverse the boarding sequence: secure your grip first, step down leading with the sound leg and let the prosthetic leg follow onto solid ground before you let go of the handhold.
Never jump down to save time. A momentary stumble while everyone is watching is far more disruptive than the extra second a controlled step takes.
How Caregivers Can Help Without Taking Over
If you are helping someone board, stand on the prosthetic side, since that is exactly where stability is weakest during the step. Offer a forearm or shoulder as a steady anchor rather than grabbing their arm, hand or the prosthetic leg itself, and always ask before you touch.
Let the person set their own pace, and step in only if they visibly lose balance, rather than lifting or pulling them up. This small shift, offering support instead of taking over, keeps the moment dignified and genuinely safer.
When an Unsteady Step Is Actually a Fit or Alignment Problem
If you find yourself gripping the vehicle frame for dear life every single time, or your prosthetic foot never quite lands the step with confidence, ask whether the issue is your technique or your socket. [socket fit and alignment problems] are a far more common explanation than most people realise, and they are entirely fixable.
A loose or misaligned socket lets your residual limb shift inside it at exactly the moment you need precise control. A loose or misaligned socket is one of the most common and fixable causes of falls during high step-ups, and it has nothing to do with your skill or effort.
At Instalimb, we have designed over 500 prosthetics across Delhi, Gurugram, Hyderabad, Bangalore, Mumbai and Vizag, using 3D-printed socket technology for a precise, repeatable fit. That level of fit is what separates a confident step from a hesitant one. If this sounds familiar, a [test socket fitting] lets you feel the difference before committing to anything.
Festival Season and Monsoon Footboards: Extra Care This October and November
October brings Navratri, Dussehra and Karwa Chauth, rolling into Diwali, Bhai Dooj and Chhath Puja by mid-November, and short-hop auto and tempo travel surges as families move between markets, temples and gatherings. More trips mean more chances to rush a boarding you would normally take slowly, especially with festival crowds adding to the usual press of passengers.
Weather adds another layer depending on where you are. Hyderabad and Vizag are moving through the northeast monsoon, so wet footboards demand a firmer grip and a slower, more deliberate step. Delhi and Gurugram stay largely clear and dry through this period, while Mumbai is only just exiting its monsoon, so puddled footboards are still a real concern there. A well-aligned, 3D-printed socket holds its fit even when footboards turn slippery, which matters most during this wetter stretch of the year.
Wherever you are travelling, from Bangalore's auto stands to a shared tempo on a hill route, the same unhurried sequence protects you. For longer festival journeys, [bus travel tips] cover the different challenges of boarding a bus instead.
Frequently Asked Questions
Q1: How should someone with a prosthetic leg get into an auto rickshaw safely?
Step up leading with your sound leg and use the auto's handrail or seat frame for a firm three-point grip before shifting weight onto the prosthetic side. If you have a below-knee amputation, you can usually manage the single high footboard with a steady push-off; if you have an above-knee amputation, you should pause to stabilise the knee before transferring weight, since autos offer no second handhold and drivers rarely wait for a careful mount.
Q2: Why does stepping into a jeep or tempo feel harder if you have an above-knee amputation than if you have a below-knee amputation?
If you have an above-knee (transfemoral) amputation, you must control an artificial knee joint through the full unsupported step, so the limb can buckle if you shift your weight too early. If you have a below-knee (transtibial) amputation, you keep a natural, pre-stabilised knee and only need to manage ankle and socket stability. Balance research backs this up: the two groups show different predictive thresholds on standard clinical balance tests.
Q3: What should a caregiver do when helping someone with a prosthetic leg into a high-floored vehicle?
Offer a forearm or shoulder for balance rather than grabbing the person's arm or prosthetic leg, and ask before touching, since an unexpected grip can throw off a controlled weight shift. Stand on the prosthetic side so support is available exactly where stability is weakest; let the person set the pace and step in only if they visibly lose balance rather than lifting or pulling them up.
Q4: Can a loose or misaligned prosthetic socket increase your risk of falling while boarding transit?
Yes. When your socket is loose or misaligned, your residual limb can shift inside it at exactly the moment you need precise control, which is a common and fixable reason for a stumble during a high step-up. This can turn a routine auto or tempo boarding into a fall that has nothing to do with your skill or confidence, which is why a properly fitted, well-aligned socket counts as a frontline safety measure for you.
Q5: Are autos, jeeps and tempos in India accessible for people with disabilities?
Not by design. Most autos, jeeps and shared tempos in India have a single high footboard, no second handrail and no ramp or kneeling mechanism, so how accessible your ride feels depends largely on your own technique and any help you get. The Supreme Court of India has affirmed accessible transport rights under the Rights of Persons with Disabilities (RPwD) Act, 2016. On-ground retrofitting remains limited, so your own boarding strategy and prosthetic fit stay the practical safeguards for now.
Conclusion
Getting in and out of an auto, jeep or tempo does not have to be a daily gamble with your balance and your confidence. With the right sequence, a little patience and support that respects your pace, this ordinary moment can feel as steady as any other part of your day. And if the step still feels unsteady no matter how careful you are, that is worth a proper look, not something to push through alone.
Check out our blog section for more!
Eating Out With a Prosthesis: Seating, Steps, and Getting Around Restaurants
A meal out is meant to be a chance to relax. But an unfamiliar restaurant can bring practical questions: Is there a step at the entrance? Will the tables be crowded? Can I sit comfortably? Where can I put my walking aid?
A little planning can make dining out easier. The details that matter will vary with your prosthesis, mobility, comfort, and the restaurant, so use the suggestions that suit you.
Choose a Restaurant That Fits Your Needs
Before you go, look at the restaurant’s photos, menu listing, or recent reviews. If accessibility details are missing, call and ask a few specific questions:
-
Is there a step at the entrance, or a ramp?
-
Are there stairs to the dining area or restroom?
-
Are there tables with enough space to move through?
-
Can you reserve a chair with arms or a table near the entrance?
-
Is there space to park a wheelchair, walker, or crutches if you use one?
You do not need to explain your entire medical history. A simple request—“I use a prosthetic leg; could you reserve a table with a clear path and a chair with arms?”—is often enough.
Think About the Route From Door to Table
The entrance is only one part of the visit. Consider the whole route: getting from the vehicle or drop-off point to the entrance, moving through the dining area, reaching the table, and finding the restroom.
A crowded aisle, loose floor mat, wet patch, or uneven threshold can make movement harder. If you arrive and the route feels unsafe, ask staff whether another table is available. It is reasonable to take a moment to look around before choosing where to sit.
Find a Comfortable Seat
A stable chair with arms can make sitting down and standing up easier for some people. A seat that is too low, too soft, or tucked tightly under the table may be harder to use. If you need extra room for your prosthesis, ask whether the table can be moved slightly.
Once seated, take a moment to settle your leg and check that nothing is pressing uncomfortably against the socket. If you use a wheelchair or another mobility aid, ask staff to keep it nearby and accessible rather than moving it out of reach.
Take Your Time With Steps and Crowds
Restaurants can become busy, especially during peak meal times. If the entrance or dining area is crowded, wait for a clear path rather than trying to squeeze through quickly. Use the handrail if one is available, and ask a companion or staff member for help if you want it.
If stairs are part of the route, decide whether they feel manageable before proceeding. You can ask about another entrance, a ground-floor table, or a takeaway option. Choosing a different plan is a practical decision, not a failure.
Plan for the Restroom
If you think you may need the restroom, ask about its location and route when you arrive. Check whether there are steps, a narrow doorway, or a cramped layout. If you use a mobility aid, make sure you can bring it close enough to reach safely.
Public restrooms vary widely. If the available facilities do not feel safe or usable, consider whether you would be more comfortable at another nearby location. Planning a stop before you leave home can also help reduce uncertainty.
Make Room for Comfort During the Meal
Sitting for a long time may feel uncomfortable for some prosthesis users. If your limb starts to feel hot, pressured, or irritated, adjust your position or take a break when it is safe to do so. If you experience persistent or sharp pain, it is sensible to end the outing and contact your prosthetist or clinician for advice.
You might choose a table near an exit if you prefer an easy route outside, or let your dining companions know that you may need to stand or change position during the meal. Small adjustments can make it easier to enjoy the visit without rushing.
What Can Help You Feel Prepared?
Depending on your needs, you may find it useful to bring:
-
A mobility aid you normally use
-
A phone with enough battery to contact someone
-
A small cloth or wipes
-
Any prosthetic socks or other items you have been advised to carry
Follow the advice from your prosthetist about your specific device and what to do if it feels loose or uncomfortable. Avoid attempting repairs or adjustments you have not been shown how to do.
Frequently Asked Questions
Should I call a restaurant before visiting?
It can help if you are unsure about the entrance, stairs, seating, or restroom. Ask about the specific features that affect your visit.
What if the restaurant cannot offer the seating I need?
You can ask whether another table is available, choose a different time, or consider takeaway. You are allowed to decide what feels comfortable and safe.
Can I ask restaurant staff to move a chair or table?
Yes. A brief request can help create more space. If staff cannot move furniture, ask whether there is another seating area with a clearer route.
What should I do if my socket becomes uncomfortable while I’m out?
Pause and find a safe place to sit or rest. Follow the guidance your prosthetist has given you. If discomfort is sharp, continues, or comes with skin irritation, contact your prosthetist or clinician.
Enjoying the Meal, Your Way
Dining out may take a little more planning, especially in a crowded or unfamiliar place. Choosing a suitable venue, asking for the seating you need, and giving yourself time to move can make the outing more comfortable. The goal is to enjoy the company and the meal at a pace that works for you.
Check out our blog section for more!